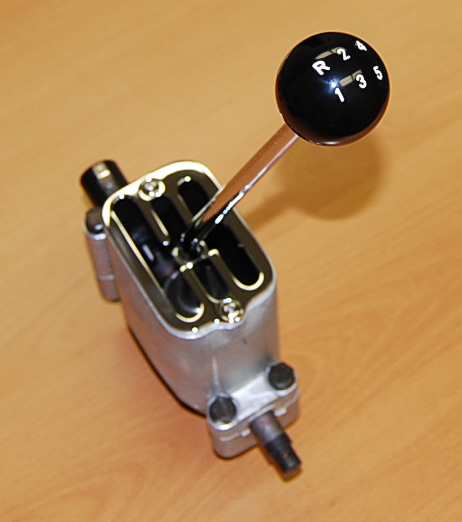
As with any Ferrari the famed gated shifter is a centerpiece in the interior. Ours was a little tired and the reverse lockout was worn to the point that it no longer prevented its accidental engagement. A quick TIG weld and plenty of detail filing before chrome and the gate is as good as new.
In addition there was a few other things missing:
1. We did the crazy task of polishing the head of the shift gate screws. When they are made there is a slight deformation because of the striking that makes the Phillips head depression. This flaw is magnified when polished so we first sanded the head of the screw to a perfect convex and then polished it to a mirror finish.
2. The shift knob received a fresh coat of white in the letters and a mirror polish to the plastic knob.
3. The original shift knob lock screw that was badly scratched and marred from years of butchery has been lovingly re-shaped and chromed to look as new.
Lots of time spent on details that will likely never be noticed but we just can't help ourselves and are having fun being crazy.


how did you polish shift knob? products used?
ReplyDeleteThe shift knob was polished using first 2000 grit sandpaper lubricated with soapy water followed by 3000 grit again lubricated. This was then followed up using automotive rubbing compound for paint in progressively finer grits until a perfect finish was achieved. We did not find any one particular brand better than another but we have always had good success with any product made by 3M. If you buy one of their 'headlight restoration kits' you should have everything you need to polish your shift knob.
ReplyDeleteDiesel tank leak fix Nova Scotia
ReplyDeleteAir dryer not building pressure repair Alberta